Showing posts with label Recipes. Show all posts

Friday, April 19, 2013

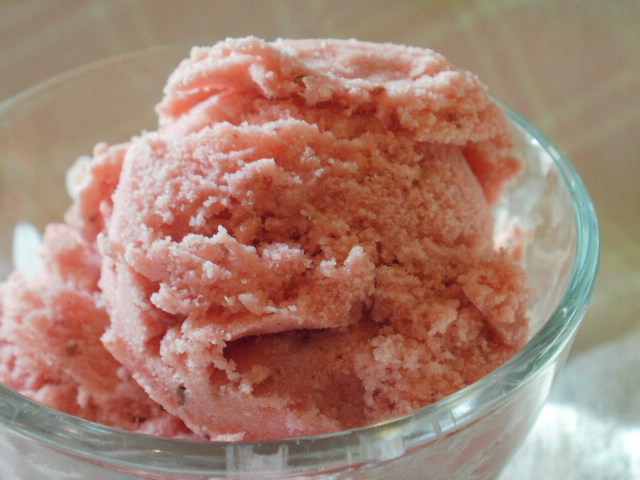
Couldn't-Be-Easier Strawberry Ice Cream


Our strawberry plants are beginning to bloom, so it won't be long before we have enough berries for ice cream!  This ice cream has just four ingredients and doesn't require an ice cream freezer.  I used frozen strawberries from last summer for this post.  I have also used blackberries, raspberries, and peaches with good results.  Just make sure they are solidly frozen first, and adjust the sweetness after everything else is blended.  You may not need as much sugar as you think.

This ice cream is fresh tasting, and both sweet and tangy at the same time.  I think you'll love it!


Couldn't-Be-Easier Strawberry Ice Cream

2 cups of frozen strawberries (if frozen in syrup, reduce or eliminate sugar)
2 cups heavy cream (I had and used raw cream, but any heavy cream will do)
1 teaspoon vanilla extract
sugar to taste; amount depends on fruit and whether or not it has a syrup

Place frozen berries in bowl of a food processor with the chopping blade attached.  Process berries until ground into fine bits, almost like a course powder.  Warn your family and pets first that this will make A LOT of noise.

Add vanilla. 

Add cream gradually while continuing to process, until the mixture is the consistency of soft-serve ice cream or a very thick milkshake.  Stop processor and scrape down sides as needed. 

Taste for sweetness; add sugar or other sweetener 1 Tablespoon at a time until desired sweetness is reached.

Spoon ice cream into a freezer-safe bowl with lid and chill until firm, 1-2 hours.  Alternately, you can spoon the soft mixture into traditional freezer-pop molds or silicone yogurt/popcicle molds for individual frozen treats.

Makes about 1 quart of ice cream.

Wednesday, April 17, 2013

Healthier Nacho Chicken Casserole

Recently I saw a recipe for a Mexican-style cheesy chicken casserole that sounded tasty, but it had a few ingredients I'd rather not use, like canned cream of chicken soup, white rice, and packaged taco seasoning.  It also had pre-shredded cheese (eww - cellulose) and canned corn (eww - I don't like it).

I decided to make some changes so that I'd feel better about eating it and serving it to my family.  Here's my version, which I think is a little more nutritious.


Healthier Nacho Chicken Casserole

3 Tablespoons butter
3 Tablespoons unbleached white or whole wheat flour
1-1/2 cups chicken broth (preferably homemade)
1-1/2 to 2 cups cooked brown rice (1/2 cup before cooking)
1 medium ripe tomato, diced
1-1/2 cups frozen kernel corn
1/4 cup diced red bell pepper
1/4 cup diced green bell pepper
1 can (4 oz.) diced green chiles, with liquid (could use 1 large fresh mild chile, seeded and diced)
2 Tablespoons homemade taco seasoning (or 1 packet of store bought seasoning)
1-1/2 cups shredded cheddar cheese (shredded from block cheese), divided
2 cups diced cooked chicken (either light or dark is fine)

Heat oven to 350°F.  Spray a 2-quart baking dish with pan spray.

Melt butter in a medium saucepan.  Stir in flour.  Cook and stir for 1-2 minutes.  Whisk in chicken broth and bring to a boil, stirring constantly.  Whisk until mixture thickens.  Set aside.

In large bowl, combine rice, tomato, corn, red and green bell pepper, chiles, taco seasoning, 1 cup of cheese and chicken.  Pour thickened chicken broth over mixture and stir until well combined. 

Transfer mixture to prepared baking dish and bake for 30 minutes or until heated through.

Top with remaining 1/2 cup cheese and the crushed tortilla chips.  Return to hot oven for 10 minutes.  Serve hot.

Makes 4 to 6  servings.


Friday, April 12, 2013

Simple Sausage and Egg Casserole

Here is an easy recipe that I adapted from a few others I found online and in cookbooks.  Add toast, biscuits or some homemade pastries, and maybe a bowl of fruit, and you have a simple weekend breakfast or brunch.  It can be made in the morning or the night before.


Simple Sausage and Egg Casserole

1 pound pork breakfast sausage
3-4 large potatoes
8 eggs
1-1/2 cups milk
1 teaspoon seasoned salt or seasoning blend of choice
1/4 teaspoon ground black pepper
1 Tablespoon snipped fresh parsley (or 1/2 teaspoon dry parsley flakes)
1 cup shredded cheese of your choice

Meanwhile, crumble and brown sausage in a large pan or skillet.  Drain; rinse if desired.  Spread cooked sausage in bottom of 9 x 13 baking dish that has been sprayed lightly with non-stick spray.

Peel potatoes and cut into 3/8" dice.  Bring to a boil in salted water and let boil about 1 minute.  Drain, then spread over sausage in pan.  Alternately, use a package of frozen chunky hash browns. Set pan aside to allow sausage and potatoes to cool.

In large bowl, combine eggs, milk, seasoned salt, pepper and parsley.  Beat until well combined.  Pour mixture over cooled potatoes and sausage.

To bake immediately, heat oven to 350°F.  Sprinkle casserole with cheese and bake for 20-25 minutes or until knife inserted in center comes out clean.

To make ahead, cover sausage, potatoes and egg mixture, then refrigerate overnight.  When ready to bake, heat oven to 350°F.  Uncover casserole and sprinkle top with shredded cheese.  Bake uncovered for 40-45 minutes or until knife inserted in center comes out clean.

Makes about 8 servings.

Friday, April 5, 2013

Coconut-Carrot-Zucchini Snack Bars

I made these bars for my family's breakfast, but they are great for snacks or lunchbox treats as well.  Use any frosting or glaze recipe you like (I used this one), or to keep things simple, add the nuts to the batter and give the bars a quick dusting of powdered sugar.


Coconut-Carrot-Zucchini Snack Bars


2 eggs
1/2 cup brown sugar
1/2 cup coconut oil (or oil of choice, but the coconut oil adds flavor)
1/4 cup honey
1 teaspoon vanilla extract
1/2 cup shredded coconut
1 cup shredded carrot (1 large carrot)
1 cup shredded zucchini  
1 1/2 cups flour
1 teaspoon baking powder
1/2 teaspoon ground ginger
1/4 teaspoon baking soda
1/4 teaspoon salt

1/2 C chopped nuts of choice (optional) (I used walnuts)

Heat oven to 350°F.  Lightly coat a 9x13 pan with pan spray.

In a large bowl, whisk together the eggs, brown sugar, coconut oil, honey and vanilla until smooth. Mix in the carrot, zucchini and pecans.

In a separate bowl, combine flour, baking powder, ginger, baking soda and salt. 

Add the flour mixture to the egg mixture and mix just until they are combined.

Pour the batter into the prepared and bake for 20-25 minutes, until the top springs back when pressed lightly.

Remove from oven and cool completely (in the pan) on a wire rack.

Frost as desired and top with chopped nuts.

Makes 15-20 bars, depending on size.

Wednesday, March 27, 2013

How to Make Frozen French Fries at Home


Although they aren't the healthiest of foods, I think just about everyone likes to eat french fries now and then.  Really good fries require cooking not once, but twice, or even three times, to end up fluffy inside and crispy outside.  In other words, making them from fresh potatoes is time consuming, and shoppers often turn to frozen fries from the store instead.

In this post I'll show you how I make homemade fries in bulk to freeze to for future meals.  They are still time-consuming, but I'd rather make up a bunch of them once than to have to go through the whole process every time I want to serve fries.

This method starts out with 10-pounds of unpeeled potatoes.  By the time they are peeled, blanched and par-fried, the result is about 6 pounds of french fries to put in the freezer.


How to Make Frozen French Fries

Equipment:

Very large stock pot (I used my pressure canner without its lid)
Potato peeler or paring knife
Chef's knife or french fry cutting gadget such as this Le Presse - (garage sale, $5)
Cookie sheets and cooling racks
Large strainer or colander
Deep fryer
Plain brown paper bags, parchment paper or paper towels (paper bags work best)
Zippered freezer bags

Ingredients:

10 pounds large baking potatoes (russets or Yukon golds work well)
5 quarts of cold water
1/4 cup sugar
2 to 4 Tablespoons salt (we like to use at least 3 Tablespoons)
Oil for your fryer (we prefer peanut oil for flavor, ease of cleanup and reduced frying odor in the air)

Make brine by placing 5 quarts of water, along with sugar and salt, in large stock pot and stir until sugar and salt dissolve.  (The sugar makes the fries brown better, the salt makes them taste better.) Set pot on burner of stove.

Peel potatoes and using either knife or fry cutter, cut into long fries about 3/8-inch square.  Place fries into brine as you cut them.  Once all potatoes are cut, let sit in brine for about 10 minutes.

Meanwhile, place cooling racks inside cookie sheets.  You'll need several.  I used 4 half-sheet pans. 

Pour peanut oil into fryer per manufacturer's instructions, but do not turn on yet.

Once fries have brined for 10 minutes, turn on heat under the pot to high.  Blanche fries by bringing them just to a boil, removing from heat just as the first big bubbles appear in the center of the pot (there will be small bubbles around the edge before the bigger ones appear).  The goal is to just barely cook the fries.  They should still be quite rigid after they have been blanched.  Place colander in sink and carefully drain potatoes.  If your pot is too large to lift and drain safely, scoop potatoes out into a large bowl using a slotted spoon.

Carefully place blanched fries on cooling racks in cookie sheets.  By the time you have the sheets filled, if you have more potatoes, you can lift the racks off the sheets and place remaining fries onto the sheets.  Once they have cooled this much, they won't stick to the surface.  Allow fries to cool completely.  Set one empty cookie sheet aside.

Fries cooling after being blanched.

Meanwhile, heat oil to 375°F.  Line the cookie sheet you set aside with brown paper, parchment paper or paper towels, and have more liners ready for the other cookie sheets as they become available.

When oil is hot, fry french fries in batches according to your fryer's instructions.  Do not overfill fryer basket (trust me on this).  Fry each batch for exactly 2 minutes.  Lift basket, allow to drain for a couple of minutes, then turn fries out onto cookie sheet lined with paper.  The fries will not be brown, but will have a very light, protective crust on the outside.  If you eat one a this point, it may be close to cooked inside, but will be heavy and waxy instead of light and fluffy.

Fries draining on brown paper after having been fried the first time.

Continue to fry french fries in batches as the previous batches cool.  Drain all of them well on brown paper and allow them to cool completely.  Once cool, no need to flash-freeze.  Just bag them into zipper bags and freeze.

To cook and serve these fries, you can:

1) Heat fryer to 375°F.  Add frozen fries to fryer basket (do not overfill) and carefully lower basket into hot oil.  Fry until golden brown and crispy, 3 to 6 minutes.

2) Heat oven to 425°F.  Place frozen fries in a single layer on a cookie sheet and bake for about 30 minutes or until desired brown crispiness is reached, flipping fries once during the cooking time.

Personally, I think frying is both tastier and quicker, but you decide for yourself.

Finished fries are light and fluffy inside.


So, there you go.  Frozen fries at home.  They're a little bit of work on the front end, but they pay off big when you're ready to serve some burgers or sandwiches on a busy weeknight. 

They're a bargain, too.  Even if you don't have a friend to give you potatoes like I did, you can sometimes find potatoes at the store for as little as $1-$2 for 10 pounds.  So 10 pounds of potatoes become 6 pounds of fries for $2 or less.  A 2-pound bag of store brand french fries is about $1.50, with national brands being even higher.  The amount saved?  Well -- it's no small potatoes.
Tuesday, March 26, 2013

Springtime Coconut Cake

Who's ready for spring?  I know I am.  The calendar says it's here, but there are several inches of fresh snow on the ground that beg to differ.

Enough is enough -- if I can't have spring outside, I'll have it inside with this delicious coconut cake.  It smells and tastes of warm days in the sun.  It's sure to brighten even the snowiest of spring days.


Springtime Coconut Cake

2-1/2 cups all-purpose flour
1 teaspoon baking soda
1 teaspoon salt
1/2 cup shredded coconut (sweetened or unsweetened, your choice)
1 cup buttermilk or soured milk*
2 teaspoons vanilla extract
2 teaspoons coconut extract or flavoring
1/2 cup butter, softened
1/2 cup virgin coconut oil, melted**
2 cups sugar
5 eggs

* make soured milk by placing 2 teaspoons lemon juice or white vinegar in measuring cup and filling with milk to make 1 cup.
** can use an additional 1/2 cup of butter instead of coconut oil, but using virgin coconut oil enhances the coconut flavor of the cake

Heat oven to 350°F.  Lightly grease or spray a 9x13 cake pan.  Set pan aside.

In a large bowl, combine flour, baking soda, salt and shredded coconut.  Mix well, then set aside.

In small bowl, combine buttermilk, vanilla extract and coconut extract.  Set aside.

In separate large bowl, with electric mixer, cream butter and coconut oil with sugar until light and fluffy.  Add eggs, one at a time, mixing well after each egg is added.

In same bowl, alternate between additions of flour mixture and milk mixture until all ingredients have been added and batter is light and fluffy.  Spoon into prepared pan and spread evenly.

Bake at 350°F for 40 minutes or until wooden pick inserted in center comes out clean.  Remove from oven and place cake, in pan, on cooling rack.  Cool completely.

Frost with coconut butter cream frosting (below).  Sprinkle cake with additional shredded coconut and decorate with pastel jelly beans if desired.

(If you prefer to make a 2-layer cake, spread batter into two prepared round cake pans.  Bake as above, but begin checking cakes after 30 minutes in the oven.)


Buttercream Frosting

1 cup (2 sticks) butter, softened*
1 teaspoon vanilla extract
2 teaspoons coconut extract or flavoring
4 cups powdered sugar, preferably sifted
2-3 Tablespoons milk

Combine butter, extracts and powdered sugar until combined and smooth.  Add milk gradually until desired consistency is reached.

Makes about 3 cups of frosting.


*This makes an "off-white" or light creamy yellow frosting.  I do not use vegetable shortening in my cooking or baking, but if you prefer a whiter frosting, you may substitute 1/2 cup of shortening for 1/2 cup of the the butter.

Monday, March 4, 2013

Super Simple Ham and Egg Skillet

I threw this together from leftovers one morning last week.  I liked it so well, I'll be making it on purpose next time.


Super Simple Ham and Egg Skillet


For each serving:

1/2 cup chopped cooked ham
1/2 to 3/4 cup cooked grain  -- I had farro, but you could use rice, wheat berries, steel cut oats, etc.
1/4 to 1/2 cup shredded cheese of choice
1 teaspoon butter
1 slice (ring-shaped) green bell pepper
1 egg
salt and pepper to taste

In a small skillet, cook chopped ham and cooked grain over medium-high heat until ham begins to brown and mixture is heated through.  Spoon onto serving plate, sprinkle with half of cheese,  and cover with clean towel to keep warm.

In same skillet melt butter over medium heat.  Place pepper ring in pan and let cook for about 1 minute. 

Break egg into center of pepper ring in skillet.  Cook egg until done to taste.  Carefully transfer egg and pepper ring to top of grain and ham mixture.  Sprinkle with salt, pepper and remaining cheese as desired. 

Serve immediately.


Monday, February 11, 2013

Strawberry Lemonade Cupcakes

Here's a delightful cupcake recipe that combines strawberries with the refreshing taste of lemonade. I was going to save this recipe for spring, when our own strawberries are available, but strawberries are beginning to show up in the grocery stores, and this recipe is just too perfectly pink to pass up for Valentine's Day.

Because the frosting contains fresh berry puree (just fresh or frozen berries, blended with sugar to taste), I recommend keeping leftover cupcakes refrigerated. For best flavor, allow to cupcakes rest at room temperature for about 30 minutes before serving.


Strawberry Lemonade Cupcakes


3/4
cup butter
3 eggs
1 3/4 cups all-purpose flour
1 teaspoon baking powder
1/4 teaspoon baking soda
1/4 teaspoon salt
1 1/3 cups sugar
2 teaspoons finely shredded lemon peel
1/4 cup lemon juice
1/4 cup strawberry puree
2/3 cup buttermilk or sour milk
1 recipe Strawberry Lemonade Frosting (below)

Heat oven to 350°F. 

Allow butter and eggs to stand at room temperature for 30 minutes. Meanwhile, line two dozen 2-1/2-inch muffin cups with paper cupcake liners.

In a medium bowl stir together flour, baking powder, baking soda, and salt. Set aside.

In a large mixing bowl beat butter with an electric mixer 30 seconds or until fluffy.

Add sugar, lemon peel, lemon juice, and strawberry puree; beat until combined, scraping sides of bowl as needed.

Add eggs, one at a time, beating well after each addition.

Alternately add flour mixture and buttermilk, beating on low speed after each addition just until combined.  Eggs with orange yolks may make batter appear peach in color instead of pink.  The cake will bake to a pale yellow, but if you desire, add a drop or two of red food coloring.

Using a medium cookie or ice cream scoop, scoop batter into prepared muffin cups, filling each about three-fourths full.
Bake for 15 to 18 minutes or until a wooden toothpick inserted in center of cupcake comes out clean. Cool cupcakes in muffin pans for 5 minutes, then remove cupcakes from pans and place on wire racks to cool completely.

Once cooled, frost cupcakes with Strawberry Lemonade Frosting.

Makes 2 dozen cupcakes.


Strawberry Lemonade Frosting

3/8
cup butter (6 Tablespoons)
4-1/2 to 5 cups powdered sugar
3 Tablespoons lemon juice
6 Tablespoons strawberry puree

Allow butter to soften at room temperature for about 30 minutes.

In a large mixing bowl beat butter with an electric mixer on medium speed until smooth. Beat in 1 cup of powdered sugar until well blended.

Beat in lemon juice and strawberry puree.

Gradually beat in the remaining powdered sugar until frosting reaches desired consistency.  Spread or pipe frosting onto cupcakes as desired.

Friday, February 8, 2013

Asian-Style Venison and Vegetables

Chinese New Year is Sunday, February 10. Here is a quick Asian-style skillet (or wok) meal for the occasion. Served over rice or noodles, this could be a complete meal.

And, of course, use any meat that you like.  Beef, pork, chicken or even shrimp would all work just fine in this recipe.


Asian-Style Venison and Vegetables

1 pound venison or beef steaks, sliced across grain as for fajitas (or use chicken, pork, etc.)
4 cups vegetables, cut into bite-sized chunks (I used zucchini, onion, red and yellow bell peppers, celery and Brussels sprouts)
1 teaspoon cornstarch

Marinade:

1/2 cup soy sauce (low-sodium might be preferred)
1/3 cup orange marmalade
1-2 cloves garlic, minced
1-2 teaspoons Srirachi sauce (optional - I used 1 teaspoon with the option of adding more at the table)

Combine all marinade ingredients in a small bowl until smooth.

Place meat in one bowl (or food-safe plastic zipper bag), and vegetables in a separate bowl or bag.  Pour half of marinade over meat, half over the veggies.  Stir each, cover (or zip shut) and chill for at least 30 minutes and up to 2 hours.  Stir or shake contents of each container occasionally.

Drain meat, reserving marinade. 

Heat peanut oil over medium high heat in a large skillet or wok.  Add meat to pan and stir-fry until no longer pink and just barely cooked through.  Remove from skillet and set aside in a covered dish to keep it warm.

Drain vegetables, reserving marinade.

In same skillet, over medium-high heat, add a small amount of additional oil if needed, then stir-fry vegetables until tender-crisp.  Return meat to pan.

Place 1 teaspoon cornstarch in a glass measuring cup.  Gradually whisk in up to 1 cup of reserved marinade.  If needed, add water to make 1 cup.  Pour mixture into skillet with vegetables and meat, stirring constantly until sauce begins to thicken just slightly.

Serve immediately over hot cooked noodles, rice or other grain (quinoa pictured).

Makes 4 servings.

Wednesday, February 6, 2013

Make Your Own Egg Roll Wraps


There are a couple of different egg roll wraps that can be made at home.  I'm most familiar with the rolled "noodle" type of dough, but this recipe is for a wrap made from a crepe-like batter that is cooked in a small skillet on top of the stove.  The wraps are then filled and fried like any other egg roll.  The finished product was unlike any egg roll we've had before -- a bit soft after frying -- but I enjoyed them and they were a HUGE hit with Kat and Shane.


Homemade Egg Roll Wraps

1½ cups flour
½ tsp. salt
1 Tablespoon cornstarch
2 eggs
1½ cups water
Peanut oil

Combine flour, salt and cornstarch in a large bowl.

Crack eggs into a small bowl and beat using an electric mixer.

Pour the egg mixture into the flour mixture, and beat using the mixer.  Gradually pour in water as you blend.  Batter will be thin and smooth.

Pour a small amount of peanut oil into a small (6- to 7-inch) skillet.  Using a paper towel, spread oil over all of skillet's cooking surface.  Heat skillet over low heat.

Pour 2 Tablespoons of batter into skillet and tilt skillet in a circular motion to spread batter over cooking surface.  Batter should cover most of cooking surface.

When batter begins to pull away from the skillet at the edges, remove it from skillet and place it on a tray.  The top of the batter should look dry or nearly so when you remove it from the pan.

Place a damp towel over the cooked egg roll wrapper to keep it from drying out.

Wipe skillet with oiled paper towel and repeat entire process until all the batter has been cooked.

To make egg rolls, prepare your favorite filling* and let cool to room temperature (or chill).  Place about a tablespoon of filling in center of wrapper.  Fold up edge nearest you, then fold in sides, Using a thin paste of cornstarch and water, brush last exposed edge of wrapper and finish rolling as you would a burrito, pressing edges to seal.

Deep fry until golden brown.

Number of wrappers made will depend on their size.


*We like a simple filling of shredded cabbage sauteed with ground pork and seasoned with black pepper and soy sauce, but many recipes for other fillings can be found online.


Monday, February 4, 2013

Homemade Fortune Cookies

Chinese New Year is Sunday, February 10.  This week will feature three Asian-style recipes you can make this weekend.

*********

Admit it.  The fortune cookies you get at the end of your Chinese restaurant meal aren't all that tasty.  If you're lucky, they taste like vanilla cardboard.  And if you're not so lucky, well, they're just...bad.  The good news is that they aren't very hard to make at home.  It's just a quick batter, baked and wrapped around hand-written fortunes or silly sayings.


Fortune cookies, while not complicated, can be just a little tricky to make.  Here are a few tips:
  • I found that using parchment paper for these works better than a silicone mat, a greased pan or a pan lined with foil. 
  • Tilting the pan in a circular motion seems to work better than trying to spread the batter with the back of a spoon.
  • Wearing cotton or silicone gloves makes it easier to handle and shape the hot cookies. 
  • Setting the folded cookies in the cups of a muffin tin will help them to hold their shape until the cool and become firm. 
  • You may want to make two batches, because you'll finally get the hang of shaping these by the end of the first batch.
Begin by writing fortunes on 3-1/2 inch by  x 1/2 inch strips of paper, then follow the recipe.


Homemade Fortune Cookies

2 large egg whites
1/2 teaspoon vanilla extract
1/2 teaspoon almond extract
3 tablespoons oil of choice (something with neutral flavor)
1/2 cup flour (probably best to use white flour in these)
1-1/2 teaspoons cornstarch
1/4 teaspoon salt
1/2 cup granulated sugar
3 teaspoons water

Heat oven to 300°F. Line two baking sheets with parchment paper.

In a medium bowl, lightly beat the egg white, vanilla and almond extracts, and oil until frothy, but not stiff.

In a separate boil the flour, cornstarch, salt and sugar. Stir the water into the flour mixture.

Add the flour and water mixture into the egg white mixture and stir until you have a smooth batter. The batter should not be runny, but should pour or drop easily off a wooden spoon.

Place level tablespoons of batter onto the lined cookie sheet, spacing them at least 3 inches apart. Gently tilt the baking sheet in a circular motion so that each tablespoon of batter forms a 4-inch circle.

Bake until the outer edges of each cookie turns golden brown and they are easy to remove from the baking sheet with a spatula (14 - 15 minutes).  

Working quickly, remove the cookie with a spatula and flip it over in your hand*. Place a fortune in the middle of a cookie. To form the fortune cookie, fold the cookie in half, then gently pull the edges downward over the rim of a glass, wooden spoon or the edge of a muffin tin. Place the finished cookie in the cup of the muffin tin until cooled.

Continue with the rest of the cookies and batter.

Makes 9-12 fortune cookies.

* Flipping and placing the fortune on the side that was touching the pan results in a better looking cookie, IMO.

Wednesday, January 23, 2013

Pressure Cooker Venison Grand Marnier

This recipe originally came from the book "301 Venison Recipes - The Ultimate Deer Hunter's Cookbook".  It's a sweeter twist on classic beef tips and gravy, and one the family really enjoyed. It called for marinating the venison for at least 4-5 hours or overnight.  I didn't plan well enough in advance for that, so I decided to convert the original into a pressure cooker recipe. 

I used venison stew meat, dehydrated minced onions, and a can of mushrooms, so there was no chopping involved.  Feel free to use fresh onion and mushrooms, but be sure to add the mushrooms in before pressure cooking instead of after.  And as always, feel free to use beef instead of venison if you like.

I had this recipe done, start to finish, in about half an hour.  I also made a second batch, uncooked, to freeze.  When I'm ready to serve, I can dump it into the pressure cooker (thawed and frozen) and have dinner ready in a jiffy.


Pressure Cooker Venison Grand Marnier

6 ounces Grand Marnier (or any orange liqueur - I used Triple Sec because we had some)
6 ounces orange juice concentrate
6 ounces white wine
2 cups beef stock
1 teaspoon dried basil
1 Tablespoon dehydrated minced onion
Pinch of ground rosemary
1 to 1-1/2 pounds venison, cut into thin strips or chunks (I used stew meat in about 1" cubes)
1 can mushroom pieces, or 8 oz. fresh mushrooms, chopped or quartered
6 Tablespoons butter
6 Tablespoons flour
browning sauce, such as Kitchen Bouquet
Salt and pepper to taste

Place rack in pressure cooker, and add first 8 ingredients, plus mushrooms if you are using fresh.  Bring mixture to a boil over high heat, then attach pressure cooker lid.

When there is steady stream of steam emitting from pressure cooker vent, place weight on vent.  When cooker begins hissing and weight rocks gently, begin timing an cook for 20 minutes.  These directions are for my particular pressure cooker - for optimal safety, always follow the manufacturers directions for you own cooker.

Meanwhile, melt butter in a small pan and whisk in flour.  Cook over medium-high heat for about 3 minutes to create a roux.

After 20 minutes, quickly reduce pressure by placing cooker in sink and running cold water over it.  When there is no longer pressure, carefully remove lid and return cooker to stove top.

The broth may have foamed.  If so, either scrape the bits off the sides and out of the cooker, or down into the broth (I prefer down and in, because there is a lot of flavor in those bits).  Bring broth to a gentle boil.

Whisk in roux a spoonful at a time until lump free and as thick as desired.  Whisk in small amounts of browning sauce until desired rich color is achieved.

Serve over rice, pasta or homemade noodles.

Makes about 4 servings.


Friday, January 18, 2013

Homemade Saltines - Worth the Trouble


Sweets happen in our home from time to time, but we really love our salty snacks.  I've been meaning to try baking homemade crackers for a while now, and had several different recipes pinned on Pinterest.  This recipe is a combination of a few of those.  The texture is a little heavier than a commercially-made saltine, but the flavor is nearly identical.  What's more, I know (and can pronounce) every ingredient in them.

We scarfed these down - all 3 dozen of them - as soon as they were cool enough to eat!


Homemade Saltine Crackers


1 cup all purpose flour (you can also try whole wheat or other flours)
1/2 teaspoon baking soda
1/2 teaspoon salt
2 tablespoons melted butter
4 to 8 tablespoons water

Heat oven to 400°F.

In bowl of stand mixer (or by hand), combine dry ingredients.  Stir in melted butter, then add water, 1 tablespoon at a time, until a ball of dough forms and cleans the side of the bowl.

Roll on a very lightly floured surface until very thin, about 1/16-inch.  Cut into 2-inch squares.  I used a ravioli cutting wheel, but you could use a pizza cutter or an ordinary knife. 

Prick each square a couple of times with a fork to reduce bubbling.  Sprinkle with additional salt if desired (I did not and didn't miss it).

Place on ungreased baking sheet (no need to line with silicone mat or parchment, either).  Bake at 400°F for 10 minutes or until just barely beginning to brown on bottom and edges.  Turn off heat, but leave crackers in oven for and additional 20 minutes.  This step is important as it will help make the crackers crisp instead of chewy.

Remove crackers from oven and cool completely on a wire rack before serving.

Makes 3 to 3-1/2 dozen crackers.


Friday, January 11, 2013

Italian Venison (or Beef) Steak

I was hoping to come up with something clever, witty, and generally brilliant today, so here....have a recipe.

I found this recipe in a cookbook called "301 Venison Recipes - The Ultimate Deer Hunter's Cookbook". If you don't eat venison, use beef (or pork or chicken).  This recipe is similar to Veal Parmesan and was great served over a bed of spaghetti.  Kat asked me to put it on "the make it again list".  Most cuts of venison will work, since the meat is tenderized, but if you have backstrap or tenderloin, I'd recommend using those.

Venison Parmesan


Italian Venison Steak

4 venison cubed steaks or tenderized round steaks (about 2 pounds)
1/4 cup oil
1/2 cup flour or crushed crackers (I used whole wheat flour seasoned with salt and pepper)
1 egg, beaten
1 jar (26 ounces) pasta sauce (I used our home-canned sauce)
1 cup grated Parmesan cheese (I used provolone with just a bit of Parmesan)

Preheat oven to 350°F.  Slowly heat oil in large oven-proof skillet.  Dip steaks in egg, then in flour mixture.  Brown on both sides in hot oil.  Drain oil from pan; return steaks to pan.  Spoon pasta sauce over steaks.  Bake, covered, for 45 minutes (use foil if your skillet has no lid).  Top with cheese and return to oven for 5 minutes to melt.  Makes 4 servings.


Monday, January 7, 2013

Sausage and Cabbage Skillet

The end of December found me with a head of Napa cabbage that I'd bought for a different recipe that I ended up not making.  Further scrounging in the fridge netted some very flavorful pan juices from our Christmas ham, half an onion, and some carrots.  With barley from the pantry and a pound of spicy pork breakfast sausage from the freezer, I came up with this.

Shane and I loved it (Kat wasn't home to try it), and I'll be making it again.  It's a great flex recipe.  Use any kind of cabbage or fresh greens instead of Napa cabbage.  Try it with mild sausage, Italian sausage, or chorizo.  Use rice or quinoa instead of barley, although I do recommend cooking the grain in a flavorful broth instead of plain water.  All the better if the broth is homemade.

This can easily be a one-dish meal, and makes four servings if you eat like a normal person.  If you pig out like we did that night, don't expect more than two servings.

Pork Breakfast Sausage and Napa Cabbage Skillet

Sausage and Cabbage Skillet

1/2 cup barley
1-1/2 cups meat or vegetable stock (I used ham stock)
1 pound pork breakfast sausage
1 head Napa cabbage or any other cabbage or greens
1/2 large onion, sliced into strips
1 carrot, peeled and grated
salt and pepper as desired (will depend on the sausage and stock you use; I didn't add any)

Rinse barley and put in small saucepan with stock.  Bring to a boil, then reduce heat.  Simmer, covered, for 20 minutes or until liquid is absorbed and barley is tender.

Meanwhile, brown sausage in a large skillet or Dutch oven.  Drain fat if necessary, but leave about 2 Tablespoons of drippings in the pan. 

Chop Napa cabbage, or slice into 1/2-inch strips and add to sausage in pan, along with onion strips and grated carrot.  Cook and stir mixture over medium-high heat until vegetables are tender.  Cover and keep mixture warm until barley has finished cooking.

Once barley is tender, stir into cabbage and sausage mixture. 

Serve hot.

Thursday, December 27, 2012

Pork Chops in Onion-Mushroom Gravy

In the interest of cooking "real food" and trying to get away from most processed foods, I've revamped a family-favorite recipe here. This is something I used to make with condensed cream of mushroom soup and dry onion soup mix. Now I use fresh mushrooms, fresh dairy, and fresh onions. It only takes a few minutes longer to make, and in my opinion, tastes better.


Pork Chops In Onion-Mushroom Gravy


Bacon grease or oil of choice
4 pork chops, boneless or bone-in, trimmed of fat
1 medium onion, diced
4 ounces (half a carton) button mushrooms, sliced or chopped
3 Tablespoons flour
2 cups meat stock (I used pork, but could use beef or even chicken)
1/2 cup half and half
salt and pepper to taste

Heat oven to 300°F.

In a large skillet (preferrably oven-proof), heat 2 tablespoons of bacon grease, then brown all chops on both sides.  Remove chops to plate and keep warm

In same skillet, add additional bacon grease if needed, then saute chopped onions and mushrooms until onions are tender, about 5-7 minutes.

Stir in flour and cook for about 1 minute, adding small amount of additional bacon grease if needed.  Whisk in meat stock and half-and-half.  Cook, stirring constantly, for 3 to 5 minutes until gravy thicken and flour loses raw taste.  Season as desired with salt and pepper.

Return chops to skillet or transfer to an oven-safe baking dish.  Pour or spoon gravy over top.  Cover skillet with lid or baking dish with foil. 

Bake for 75 to 90 minutes or until chops are very tender.  If gravy is too thin after cooking, thicken further with a cornstarch or arrowroot slurry.

Serves 4.

Wednesday, December 12, 2012

12 Treats of Christmas - Day 12 - Easy Cheese Stick "Eggrolls"

Last, but not least, of the 12 Treats of Christmas is this repeat of a recipe I posted in October, but it's just perfect for holiday parties or at-home snacking.


Easy Cheese Stick "Eggrolls"
1 package string cheese (16 oz. = 16 pieces, usually)
1 package wonton or egg roll wrappers
Peanut oil or other oil for deep frying

Heat oil in a deep fryer to 375°F.

While oil is heating, remove wrapper from string cheese pieces.  If using egg roll wrappers, you will need one wrapper per piece of cheese.  If using wonton wrappers, you will need to cut each cheese stick into thirds crosswise and use three wrappers.

Wrap each piece of cheese "burrito-style" by placing a single wrapper in front of you with a point toward you.  Place piece of cheese across the wrapper near the center.  Fold the point nearest you up and over the cheese, but a 1/2-inch or so below the top point.  Brush exposed edges of wrapper with water.  Fold in side points, then roll cheese toward top point, pressing to seal all edges.  Set aside and cover with a barely-damp paper towel while rolling remaining cheese sticks.

Deep fry appetizers in batches in hot oil until wrappers are golden brown and bubbly.  Drain on paper towels and cool slightly before serving.

Alternately, place rolled appetizers on a lined baking sheet and bake 375°F degrees until golden brown, turning once to brown on all sides.  Let cool slightly before serving.


(BTW, I think I first saw this recipe somewhere on Pinterest, but I don't see it on my boards now, so I don't know who should get credit.)


Monday, December 10, 2012

12 Treats of Christmas - Day 10 - Easy Wintertime Salsa

I call this Wintertime Salsa because it's an easy salsa to make in the winter, when garden fresh tomatoes and peppers might not be available. It uses canned and dried ingredients, but still has a fresh taste compared to grocery store salsa sold in a jar.


Annie's Easy Wintertime Salsa

2 14.5-ounce cans stewed tomatoes, with juices (use home-canned if you have it)
8 slices of pickled jalapenos (use less for a milder salsa)
2 tablespoons of the juices from the pickled jalapenos (use less or omit for milder salsa)
1 tablespoon minced garlic
1 tablespoon bottled lime juice
2 teaspoons dried cilantro leaves
1/2 teaspoon dried oregano leaves
1/2 teaspoon seasoned salt
1/2 teaspoon ground cumin

Set one can of stewed tomatoes aside.

In a blender or food processor, combine remaining ingredients and process until fairly smooth.

Add reserved can of tomatoes and process (or use pulse setting) for approximately 1 second at a time, repeating 4-5 times, until tomatoes are blended in, but still slightly chunky.

Pour into a bowl and serve at room temperature or chill, if desired.

Makes approx. 1 quart of salsa.

Sunday, December 9, 2012

12 Treats of Christmas - Day 9 - Cherry Chocolate Malt Cupcakes

I originally made these for Kat's birthday in July of 2011, but they are so festive looking, I knew I needed to include them in the 12 Treats of Christmas!

These cupcakes are dense and fudge-y, more like a brownie than a cake.


Cherry Chocolate Malt Cupcakes

Cupcakes


1 stick (8 Tbs) softened unsalted butter
1/2 cup Hershey's semi-sweet chocolate chips
1 cup cherry preserves (I blended in food processor to make a smooth consistency)
3/4 cup sugar
1/2 cup chocolate malt powder
pinch of salt (I omitted because I used salted butter)
2 large eggs, beaten
1 cup all-purpose flour (I used 1/2 cup all-purpose white, 1/2 cup white whole wheat)

Frosting (big batch; you could make half...better if made the day before)

3-1/2 sticks butter, softened
2/3 cup cocoa
2 teaspoons vanilla extract
1 teaspoon salt - only if using unsalted butter
1 teaspoon corn syrup (can omit)
2 pounds (approx. 6-1/4 cups) powdered sugar
1/4 cup water

Garnish
1 (5 oz.) package of malt balls (Whoppers), crushed, for garnish
12 whole maraschino cherries

Preheat the oven to 350 degrees. Line cupcake pan with cupcake liners.

Put the butter in a heavy-bottomed pan on the heat to melt. When nearly melted, stir in the chocolate. Leave for a moment to soften, then take the pan off the heat and stir with a wooden spoon until the butter and chocolate are smooth and melted. Now add the cherry jam, sugar, salt and beaten eggs. Stir with a wooden spoon and when all is pretty well combined stir in the flour.

Scrape and pour into the muffin papers in cupcake pan and bake for 25-28 minutes, or until toothpick test comes our clean. Cool in the pan on a rack for 10 minutes before turning out.

To make frosting, cream together butter, cocoa, vanilla, salt, and corn syrup.  Slowly mix in powdered sugar.  Add water to desired consistency.  Frosting will be a very light brown, but will darken by the next day.  It will also have a more pronounced chocolate flavor the next day.

When the cupcakes are cool, pipe icing on cooled cupcakes using a large star tip.  Sprinkle with crushed malt balls and top each cupcake with a cherry.

Makes 12 cupcakes.

Saturday, December 8, 2012

12 Treats of Christmas - Day 8 - Pineapple Smoked Sausage Bites

Sweet, sour and salty combined in one tasty treat!


Pineapple Smoked Sausage Bites

1 cup packed brown sugar
3 Tablespoons flour
2 teaspoons ground mustard
1 cup pineapple juice
1/2 cup white vinegar
1-1/2 teaspoons soy sauce
2 pounds miniature smoked sausages

In a large saucepan, combine the sugar, flour and mustard. Gradually stir in the pineapple juice, vinegar and soy sauce.

Bring mixture to a boil over medium heat; cook an stir for 2 minutes or until thickened.

Add sausages; stir to coat. Cook, uncovered for 5 minutes or until heated through. Serve warm.

Makes about 8 dozen sausages.
Related Posts Plugin for WordPress, Blogger...