For anyone who is not familiar with milk kefir, also called dairy kefir or just kefir, it is a cultured (fermented) food item similar to a thin yogurt or buttermilk. It is full of probiotics and, at least to me, is quite tasty. I think it is milder in flavor than homemade yogurt and find it much easier to make. It is a good substitute in any recipe that calls for buttermilk, and can even replace sweet milk in many recipes. If fermented a second time, usually with some kind of flavoring, it becomes slightly effervescent and even tastier, in my opinion. Best of all, it can also be used to make some great treats.
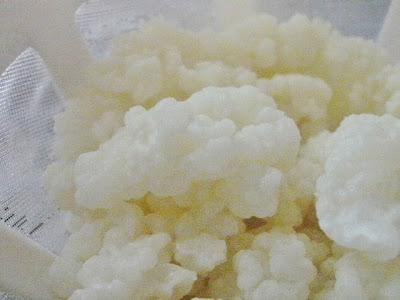
To begin, you must have a starter, which is usually called kefir grains. The starter is also known as kefir pearls, kefir scoby, as well as by a variety of other names. The starter does not come from grain at all, but rather from a combination of yeasts and (beneficial) bacteria. When dehydrated, it looks like small granules (thus the name). Re-hydrated, it resembles cauliflower, but with a spongy texture.
 |
| Kefir culture (starter). |
A nice lady on craigslist gave me my starter, but you can also find them for sale on a number of websites. If you are local to me and are interested, I can probably set you up with a starter as these things tend to reproduce with each batch of kefir.
Once you've acquired a starter, you combine it in a clean glass vessel (canning jars are good) with fresh milk. I've read that raw is best, but I've yet to get my hands on any, so I use regular (NOT ultra-pasteurized) whole milk. I suppose you can use milk with a lower fat content, but I think whole milk is recommended. The ratio is 1 tablespoon of starter grains to 1 cup of milk. I usually make several cups at a time, either in multiple jars or in a gallon glass jar.
 |
| Starter in the jars and ready for milk. |
 |
| Milk. Not raw or organic, but local. |
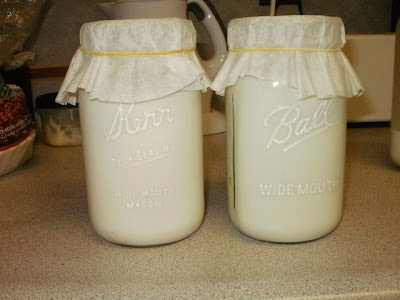
Once combined, cover your jar with a clean cloth or coffee filter and secure it with a rubber band. This will keep dust, gnats and the like out of the kefir. Set the jar on the counter, at room temperature and several feet away from any other cultured foods you have going, and let it sit for 12-24 hours. You will know it is working when you see small pockets of whey (clear, yellowish fluid) develop both on top and throughout the milk.
 |
| Kefir, ready for the first fermentation. |
You'll know it is done when the milk has thickened to the consistency of thin yogurt or buttermilk, and tastes slightly tart. The longer you let the kefir culture, the more tart it will be. When it is as tart as you like it, strain the kefir through a plastic strainer or a fine colander to remove the grains. At this point you can start another batch with the grains. The liquid kefir is now ready to drink or use in recipes. Just store it in the fridge in a covered jar to slow the fermentation process. Better yet, it can be flavored and fermented a second time for added flavor. It's my understanding that the second fermentation also increases the B vitamin content significantly.
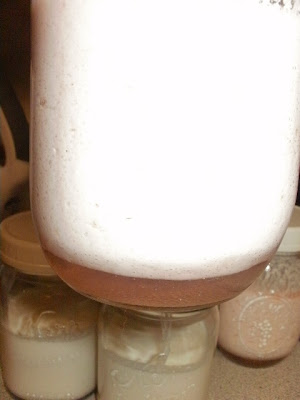
To do a second fermentation, just pour the kefir into clean jars (without any of the grains in it), and cover tightly. Let sit on the counter for another 12-24 hours (the warmer the room, the less time it will take) or until you see whey forming again, this time at the bottom of the jar. Once that happens, move the jars to the refrigerator until you are ready to use it.
 |
| Layer of whey forming under second-fermented kefir. |
You can also flavor your kefir for the second fermentation by adding sweeteners or fruit. Two of my favorites have been pure maple syrup with vanilla, and slices of organic oranges (rind and all) with a little organic sugar. I've also successfully used crushed and sweetened strawberries, strawberry-rhubarb syrup, vanilla extract with sugar, lemons, limes, and crushed blueberries. Once the second fermentation is complete, the result is a lightly fizzy, sweet-tart and fruity beverage that, while made with milk, is not heavy at all.
 |
| Kefir being flavored for a second fermentation. |
If you like, you can replace the milk in kefir with coconut milk. The taste is a lot different, but if you like coconut, it's very pleasant.
I've also used kefir, both single- and double-fermented, to make healthy and yummy ranch dressing. I just use it to replace the buttermilk in this recipe.
Sometimes, if you let the kefir ferment too long, either during the first or second fermentation, it can separate into defined layers of curd and whey. If that happens, all is not lost. The simplest thing to do with it is just stir it back together. It is not as creamy as it could be, but it is still flavorful and perfectly safe to drink.
Another option is to strain the whole thing through a plastic mesh strainer, completely separating the curd from the whey. The whey can be used in baking or for lacto-fermented veggies (recipes to come), and the curd can be used as a cream cheese or sour cream substitute. The kefir curd (kefir cream) is also an ingredient in this:
 |
| Chocolate kefir ice cream. |
I promise it will be my next cultured food recipe, and I promise you'll love it.