 |
| Ginger carrots |
Lacto-fermented veggies aren't like typical vinegar pickles. For one thing, they don't contain any vinegar. For another, they don't need to be canned (water-bath processed) like traditional pickles do. And finally, they have probiotic properties that are good for your digestive system.
Lacto-fermented veggies taste different than vinegar pickles. The veggies are raw, so they stay crunchier (the exception possibly being cucumbers) and the brine is, in my opinion, more mellow. The flavor develops with age, so the young pickles you taste after three days of fermentation on your kitchen counter will not taste the same after three weeks in your refrigerator. Well, that's what I've read, anyway, but I can't imagine them lasting three weeks in our refrigerator.
Lacto-fermenting is also an easy process. Canned pickles aren't difficult, but L-F pickles are way easier. Just chop veggies and let them sit in a brine at room temperature for a few days. Nothing could be simpler.
So far, I've made lacto-fermented radishes, turnips, dilled celery, ginger carrots, coriander carrots, plain sauerkraut, caraway sauerkraut, spicy cortido (Latin American sauerkraut) and one jar of a wonderful mix of all of those leftover kraut flavors. Shane and I agree that the radishes are our favorite so far.
 |
| Two jars of turnips, one of ginger carrots, and one of radishes |
Shane has said a couple of times that the ferments are his very favorite way to eat veggies. I have grilled him, asking if they are better than corn on the cob, or fresh tomato slices or a nice ripe avocado with a touch of sea salt, which are all favorites around here. He wouldn't say one way or another, which leads me to believe it's a close race.
As for me, I crave these veggies. It's not unusual for me to spoon out a quarter cup or so to just eat by themselves, but what I really like -- a lot -- is to spread a couple of slices of homemade bread with some real butter and use any of the fermented vegetables as a sandwich filling. These sandwiches taste yummy to me, but what's more, my body seems to be calling for them. I definitely don't mind answering.
I know a couple of readers are already trying these: Lisa at Easy Frugal Living was fermenting some carrots not long ago, and both the kraut and turnip ferments are very similar to the beginning stages of Patti, The Osage Bluff Quilter's turnip kraut recipe.
 |
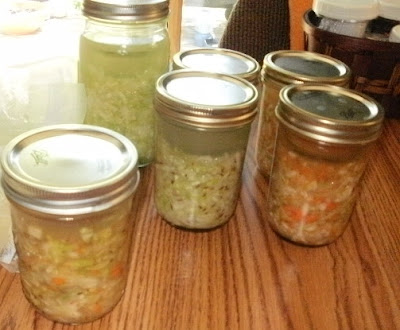
| Plain kraut, caraway kraut, cortido and a jar of all of them mixed |
If you're interested in trying lacto-fermented veggies for yourself, don't be intimidated or think you need to do a big batch. Here's all you do:
1) Clean and peel your veggies of choice. Sturdy root vegetables work well, as does cabbage, but don't be afraid to try zucchini, onions, peppers or other vegetables. Once the veggies have been cleaned and peeled, dice them or shred them as desired. If diced, you probably don't want pieces bigger than 1/2".
2) Place prepared veggies in a clean canning jar. Wide mouth works best, I think, and either quarts or pints can be used. Fill about 3/4 of the way, or maybe a little more. Add any fresh or dried herbs you might want at this point.
3) Mix a brine. For every cup of purified water (filtered, distilled or spring water all work, just not chlorinated tap water), stir in 1 tablespoon of sea salt and 4 tablespoons of whey. I usually have whey left over from making yogurt or kefir cheese. If you need whey, you can strain plain yogurt or sour cream to get enough...or you can buy whey at the health food store...or you can do without it by adding an additional tablespoon of sea salt.
4) Pour the brine over the veggies, making sure they are completely submersed. You can use a wooden spoon to press them down into the brine, or you can do what I do and weigh them down with a simple glass (not lead crystal!) votive cup that I bought at a craft store. You can also buy canning weights on eBay. Some people don't weigh down their ferments, and others prefer using air-locks or special fermenting vessels. This is what happens to work for me right now.
 |
| Simple glass votive cup for weighing down veggies |
5) Cover the jar tightly with a canning flat and ring and let the veggies sit on your counter at room temperature for about 3 days. After three days, open the jar (it might pop just a little when you do) and remove the votive holder. Taste the yummy fermented goodness. It will be really salty and a little tart. Over time, these flavors will blend and mellow.
6) Eat the veggies now or store in the refrigerator for up to several months.
To make sauerkraut, the method is almost the same: Instead of dicing the cabbage, it needs to be shredded. I do this by hand, with a knife, rather than with a food processor. Instead of making a brine with water, just add the salt and whey directly to the shredded cabbage. Put it all in a large bowl and pound with a wooden mallet of some sort until the cabbage releases it's juices. I use the wooden part of a food mill that looks like this:
When there is enough liquid, spoon the cabbage and liquid into the jars and proceed as above.
As usual, I'm no expert, but if you have any questions about lacto-fermenting, I'll try to find an answer for you.
